Where can I find a practical how-to guide for making a PM 2.5 sensor based on the SDS 011 with a display.
I want one for inside the house that works without wifi or pc that will show the current PM 2.5 concentration on a display.
Or, better yet, who can build one for me and at which price. I live in Holland.
Hi!
This could help:
It’s not mine. I just googled it.
Thanks.
That looks good.
I might try that.
You can use the firmware and hardware of Sensor.Community directly. You can plug any kind of LCD or Oled screen. Then you don t connect it to the internet. That’s all.
If you can’t program it is the best out of the box solution.
OK. Just skip connecting to the internet.
Thanks.
I have tried using an indoor sensor with LCD which works well but I connect it to my Wi-Fi. If a Sensor.Community Airrohr is not connected to the Internet, does the fan eventually stop spinning?
You’re right. It won’t stop…
One has to customize the firmware.
Hi ticzer,
I bought all the components for this project. But I cannot figure out how to get it to work. I really need to find someone who will build one for me. Any idea how to find such a person?
Actually it should work after 10 minutes without internet connection.
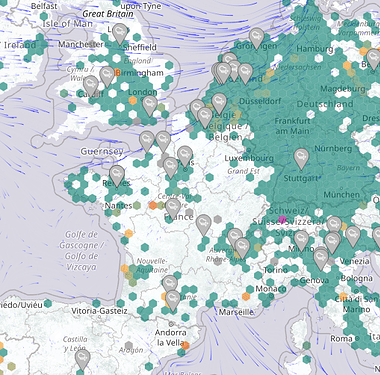
There are quite a lot of local community in Europe. Click on the pins in the main map to get the contacts.
They probably can help you to build the sensor.
But I cannot figure out how to get it to work.
Did you read this page ?
https://sensor.community/fr/sensors/airrohr/
It is not that complicated…
Hi Teacher,
I wired the components up. Downloaded the libraries. Installed them.
Wrote the code.
But when I upload the code I get the message:
can’t open device",\ .\COM3": thesemaphore period has expired.
What am I doing wrong?
Do you use the flasher? With this software it should work at once.
I can t understand what you have done. Did you follow the instructions.
Remove everything and then flash without sensor on the board.
Dear Pierre-Jean,
I did as you instructed. Took all the wires out of the Arduino nano board. Connected it to the pc. Uploaded the flash. Then still with no wires connected to the board uploaded the code. Same result.
avrdude: ser_open(): can’t open device “\.\COM3”: The semaphore timeout period has expired.
Tried uploading the code wired as well. Same result.
It would be nice to have someone assist me online with this. Or have someone build one for me. I am perfectly willing to pay for it.
Merry Christmas,
Andre
The Arduino Nano is a small, complete, and breadboard-friendly board based on the ATmega328 (Arduino Nano 3.x)
It is no ESP8266 which our firmware is made for. You did not use the flasher but the Arduino IDE. Please read the instruction attentively. Does the Arduino Nano have a WiFi chip?
Please understand that we can’t support other boards and firmwares. You would have to find and adapt all the libraries which could be very complicated. Just buy an ESP8266 (NodeMCU v3) as indicated on the website. It costs 1$ which is much less than the time to adapt the code…
avrdude: ser_open(): can’t open device “.\COM3”: The semaphore timeout period has expired.
Are you sure the COM3 is the good COM PORT ? It means that the esptool/arduino flasher can’t find the board and time out after a while.
Andre,
Waar in NL zit je? Ik kan denk ik wel helpen…
Jan
Hoi Jan,
Ik zit in Haarlem.
I don’t think the nano has a WiFi chip.
The instructions for building the sensor has an Arduino nano board.
I don’t have instructions to build a sensor with display that uses a ESP8266.
I uploaded the code to COM port 6 and this time I did not get the message that it cannot open the device.
Still the PM 2.5 values do not appeear on the screen. Actually the display has not displayed anything yet with any attempt so far.
Don’t you want to use the official instructions on the sensor.community website ?
